As promised, I am back and showing you how to make the very cool fan!
First things first, some simple supplies you will need:
a flat head and a phillips head screw driver
approximately 1/4 yard of fabric
Mod Podge
Sponge brush
scissors and a rotaty cutter and mat
First thing you need to do is dissassemble your fan blades (take them off of the fan, and take all of the screws and everything off of the blade). Then you will need to clean the blade, they are usually pretty dirty on the top where we can't see.
Cut a piece of fabric a little bigger than the size of the fan blade, cut one for each blade.
Now slather the side of the blade that the fabric is going to be on with a good layer of Mod Podge; then press the fabric onto the glued-up blade. Be sure to press out all of the wrinkles your hand will work fine, but if you have some trouble spots you can use a credit card.
Sit the blades aside to dry, about 10 mins. Then after they are dry trim the excess fabric away from the blade. I found that a rotary cutter works well for this. If you don't have a rotary cutter sharp scissors will work just fine.
After the fan blade has been trimmed up put another layer of Mod Podge on the fabric. Let it dry
After it is dry take your very sharp scissors and poke the holes that the screws go through on the blade, then add your hardware back to the fan blade. If you have an ugly gold fan like I do, you could also spray paint the hardware, I decided that I like the ugly gold next to the brown camo so I left it. But if you paint it, do so before putting it back together. :-)
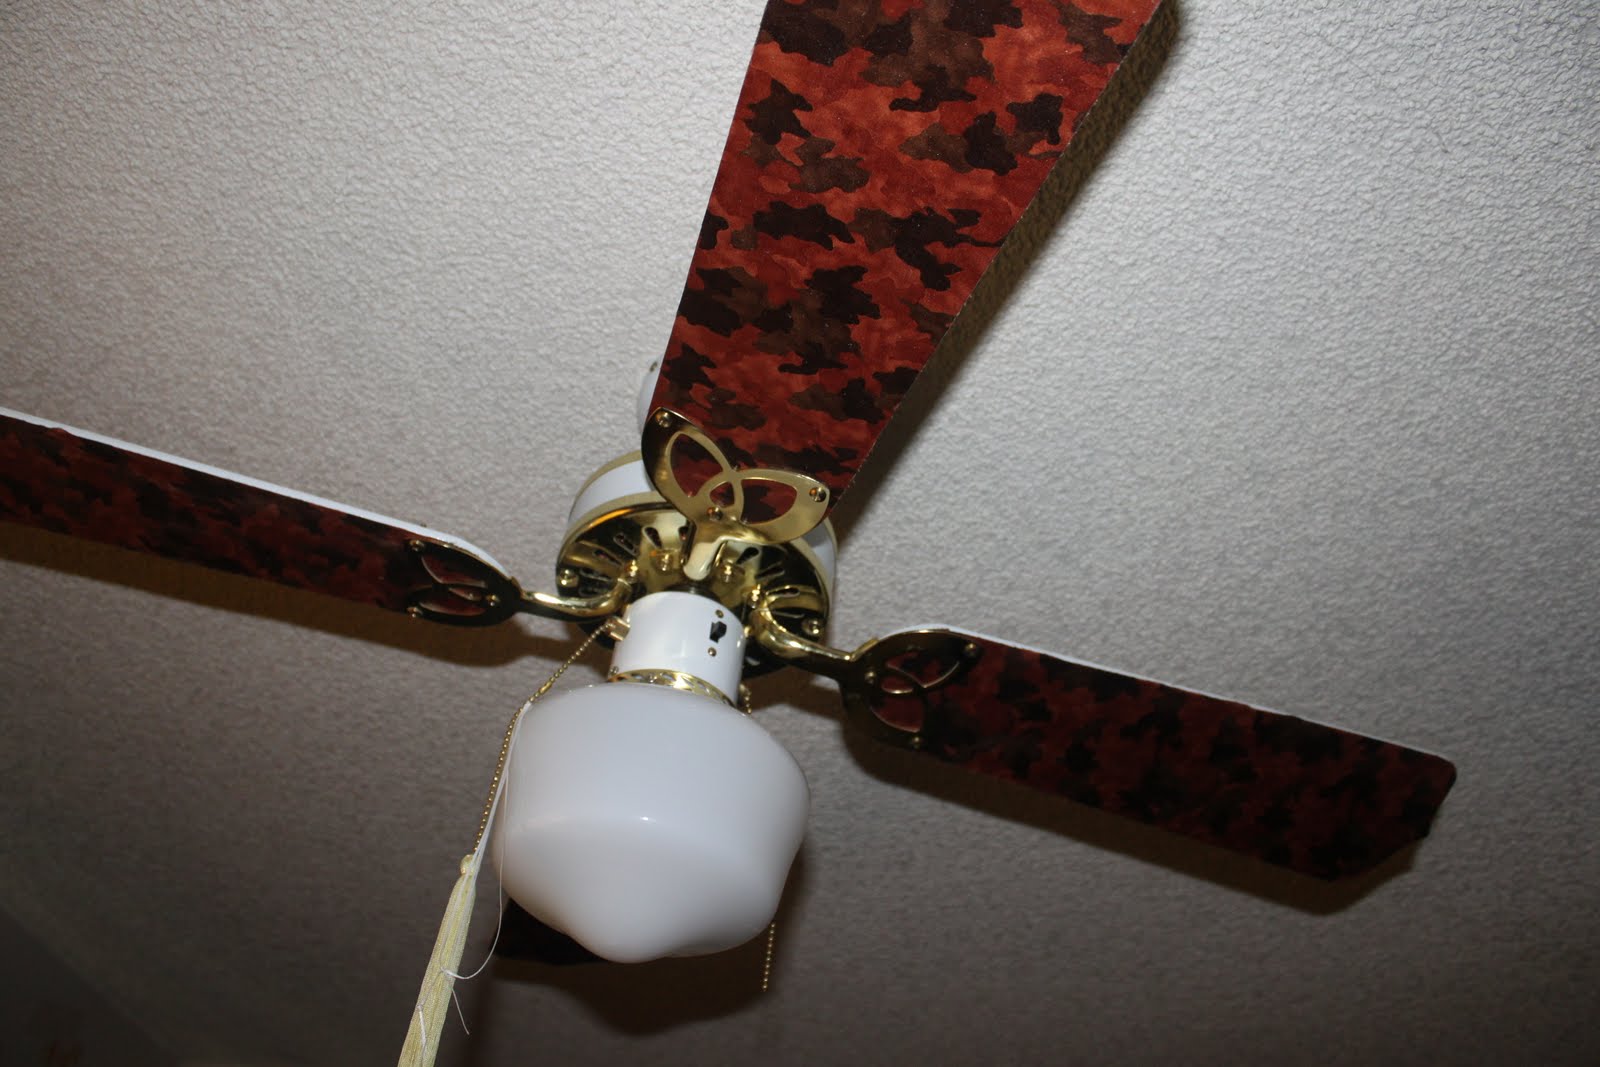
Then replace all the blades back on your fan and admire your handy work! Here are the pictures of the two fans I recovered, one in my daughters room and one in my sons room. (My next project will be scraping the popcorn ceilings. YUCK!)


Such a great idea!
ReplyDelete